
I have recently been part of a project, Building Nomi, where I was able to work on different types of integration tasks. With Building Nomi we were analyzing everyday metadata from the calendar and email to map the cooperation within organizations.
I thought I might share some of the work here. In this post, I will walk through how to set up your google workspace to be able to access email and calendar metadata through API Google API’s.
Steps:
- Create project Building Nomi on your workspace (https://console.cloud.google.com)
- Enable APIs on Project (https://console.cloud.google.com)
- Create a Service Account (https://console.cloud.google.com)
- Assign permissions (https://admin.google.com/)
Create Project for Building Nomi
Go to https://console.cloud.google.com/ and login with an administrative account.
Select Project dropdown (just right of Google Cloud Platform label). Select New Project on the form.
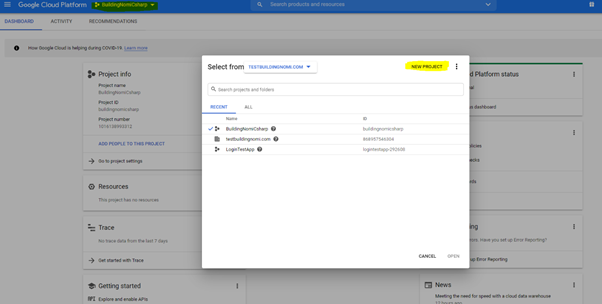
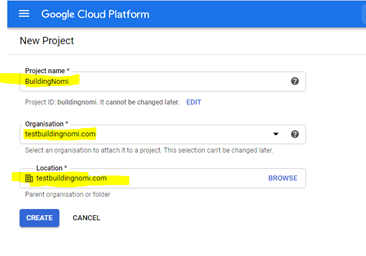
Give a name to Project, e.g., BuildingNomi. Set Organization to the domain you will be accessing. Set the Location of your environment and click Create (it may take a few seconds to complete).
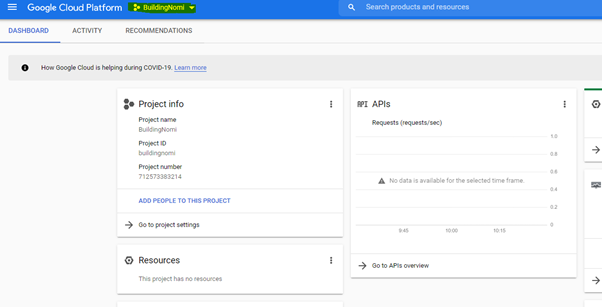
Select and switch to the newly created Project BuildingNomi.
Enable API’s for Building Nomi to interact with
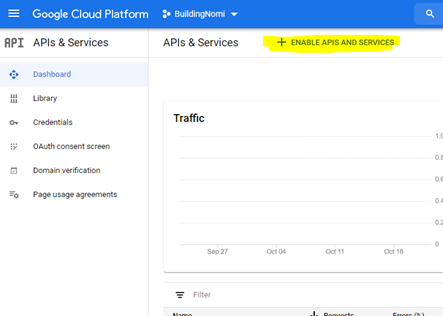
From the top-left menu, go to APIs & Services -> Dashboard
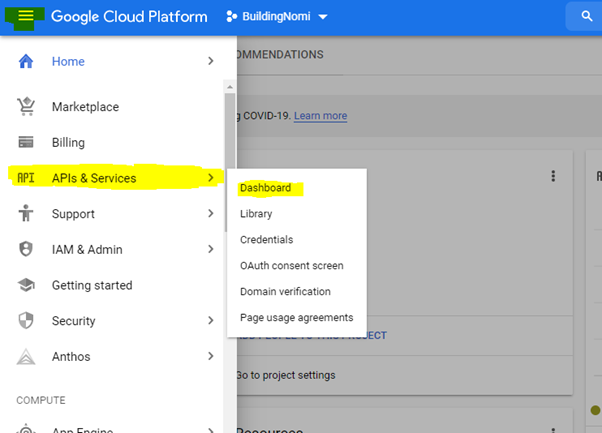
Select ENABLE APIS AND SERVICES
*Note that this step is only to let google know that you want to use your APIS. How to authenticate and access, we’ll get to later.
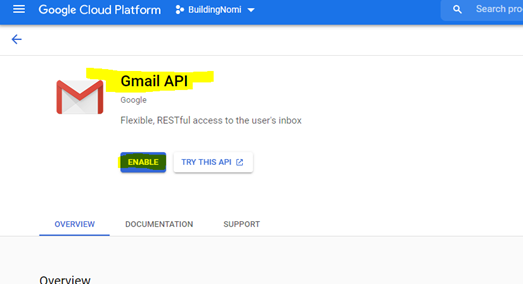
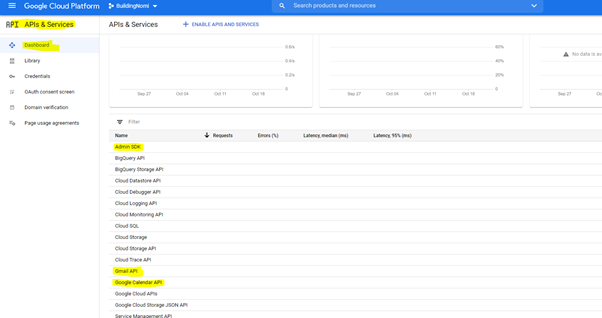
Search and Enable the following API’s:
- Admin SDK – API will be used by Building Nomi to retrieve users and groups
- Gmail API – API will be used by Building Nomi to analyze email metadata
- Google Calendar API – API will be used by Building Nomi to analyze calendar metadata
From API’s & Services dashboard, you see enabled APIs. Make sure APIs added in #7 is there.
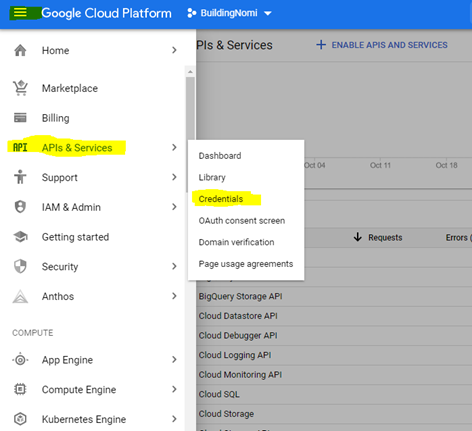
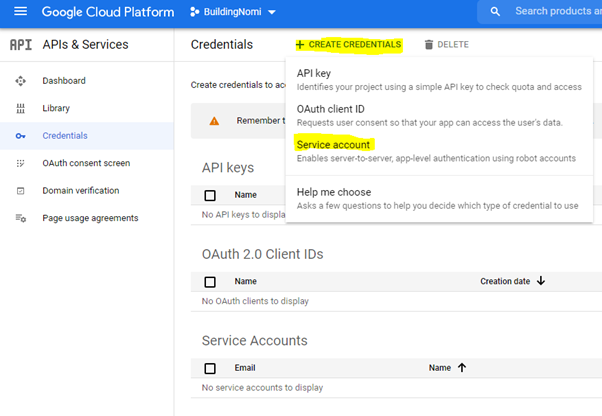
Create a service account
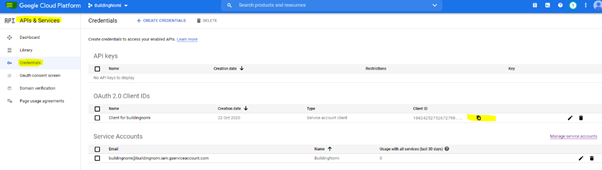
From top-left menu go to APIs & Services -> Credentials
Click CREATE CREDENTIALS and select Service account
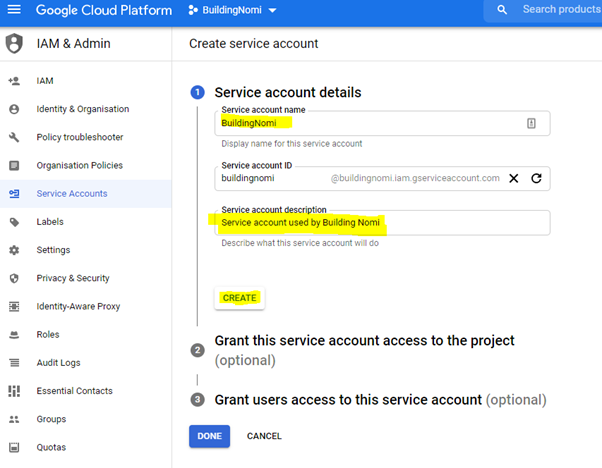
In step 1, type a Service account name, e.g., BuildingNomi. Also, type a Service account description, e.g., Service account used by Building Nomi. Now click CREATE.
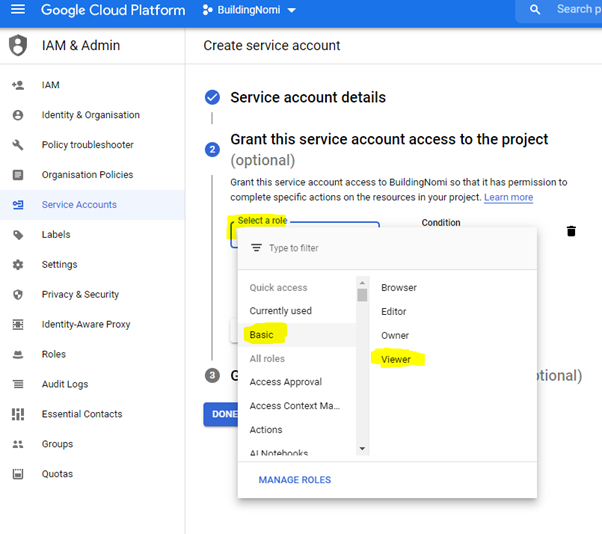
In step 2, Select role Basic -> Viewer and click DONE (we skip step 3)
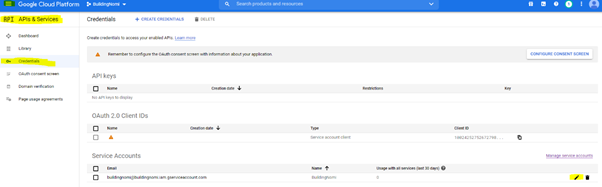
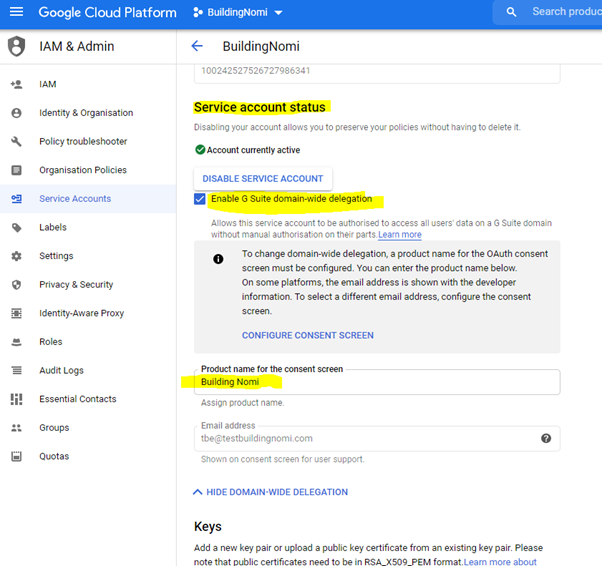
From the top-left menu, go to APIs & Services -> Credentials and click the modify icon for the newly created Service Account.
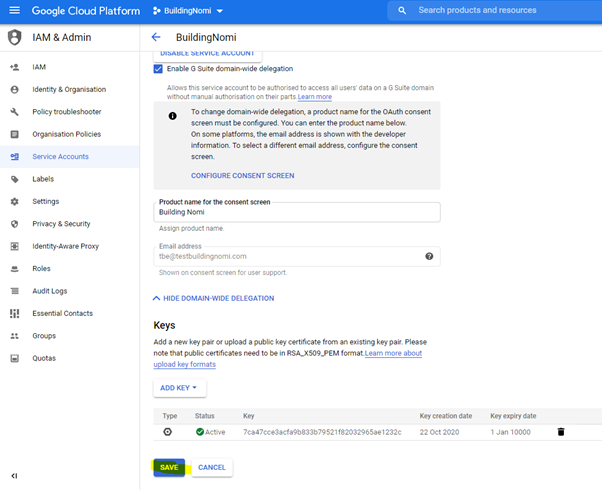
On the Service account status section, click SHOW DOMAIN-WIDE DELEGATION and put a checkmark in Enable G Suite domain-wide delegation. Also, type a Product name for the consent screen, e.g., Building Nomi.
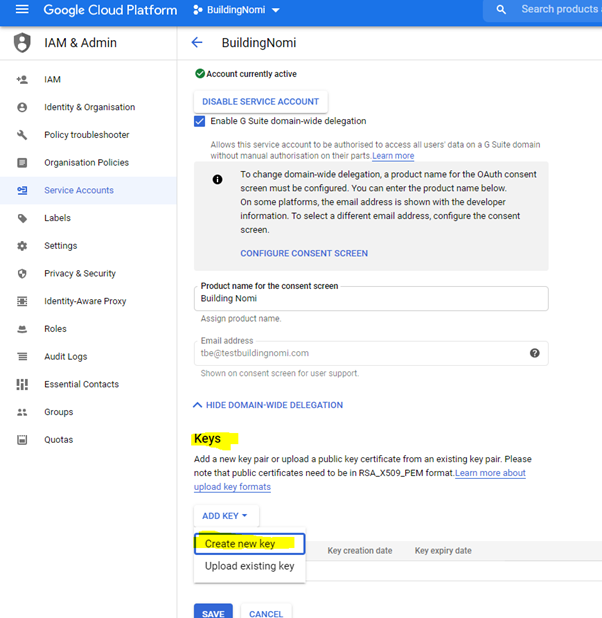
In the Keys section, click ADD KEY and then Create new key.
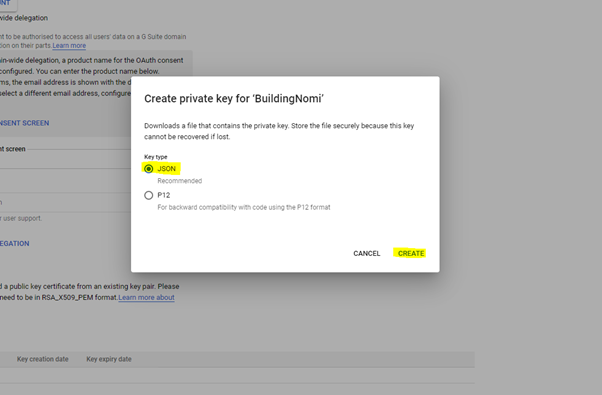
Create a private key with JSON as a Key type.
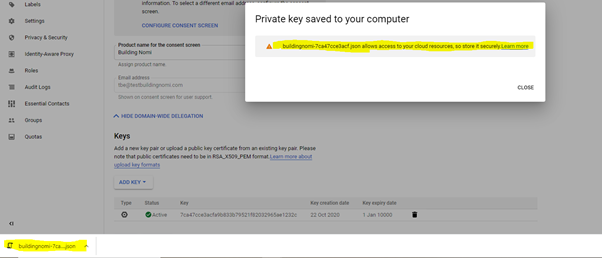
A key file with Service Account credentials has been created and downloaded. Store file securely.
On the service account page, click SAVE
From the Credentials page in section OAUTH 2.0 Client IDs, copy ClientID to clipboard (to be used in next step)
Assign permissions (scopes)
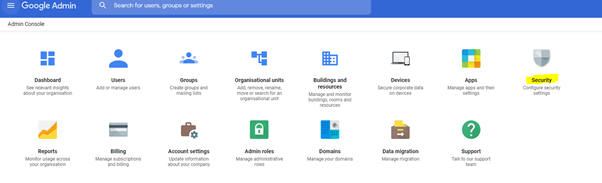
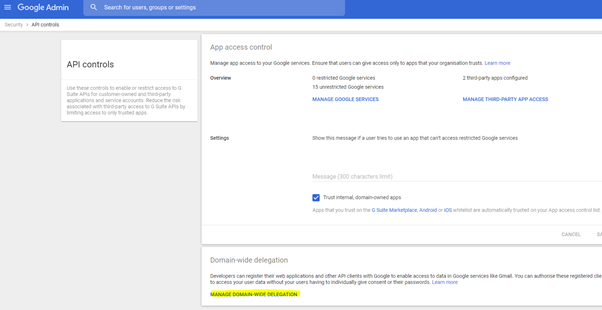
Go to https://admin.google.com/ and go to Security
On the Security page, scroll down to select API Controls
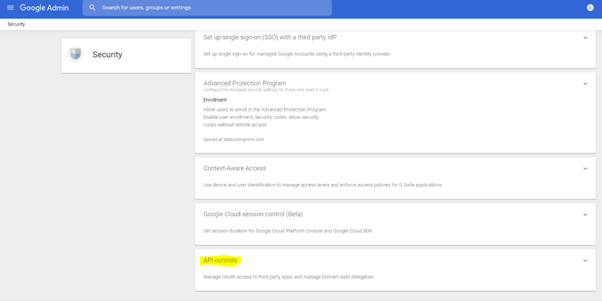
Click MANAGE DOMAIN-WIDE DELEGATION
Click Add new to add API client
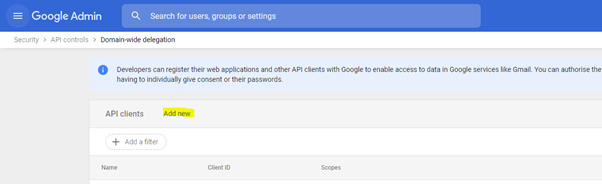
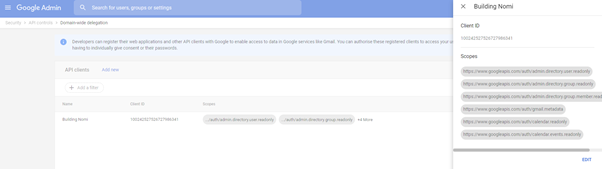
Paste the Client ID from the clipboard in the Client ID field. Then add the following permissions (OAuth scopes):
| Building Nomi permissions/scopes | Option |
| https://www.googleapis.com/auth/admin.directory.user.readonly – Used by Building Nomi to read users https://www.googleapis.com/auth/admin.directory.group.readonly – Used by Building Nomi to read groups https://www.googleapis.com/auth/admin.directory.group.member.readonly – Used by Building Nomi to read group memberships of users | Users and groups (Required) |
| https://www.googleapis.com/auth/gmail.metadata – Used by Building Nomi to read Gmail metadata of users | Gmail (Optional) |
| https://www.googleapis.com/auth/calendar.readonly – Used by Building Nomi to get user’s primary Google Calendar https://www.googleapis.com/auth/calendar.events.readonly – Used by Building Nomi to read metadata events from a user’s primary Google Calendar | Google Calendar (Optional) |
Instead of copy-pasting all scopes, it’s possible to insert oneliner below:
—
https://www.googleapis.com/auth/admin.directory.user.readonly,https://www.googleapis.com/auth/admin.directory.group.readonly,https://www.googleapis.com/auth/admin.directory.group.member.readonly,https://www.googleapis.com/auth/gmail.metadata,https://www.googleapis.com/auth/calendar.events.readonly,https://www.googleapis.com/auth/calendar.readonly
—
You are all set! 🙂